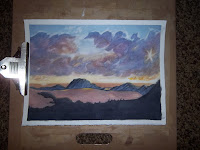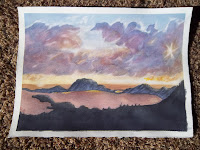

Here is the start of the Direct Glazing. This was kinda scary for me and I believed that the painting was ugly until I got further into the colors. YES painting this 5-7 times was a little daunting and time consuming, but I believe that it was worth it for the way that I got it to turn out. I am happy with what I was able to achieve with this method of painting, even though it took a lot of time, I believe that I will use it in the future when I continue to paint more.
 Adding Azo yellow to every and all spots that showed yellow or had warm spots
 Next I mixed Azo Yellow and Quin Rose to get my transparent orange and applied it to the places I felt that there were oranges.
 I then mixed Quin Rose with Cad red Lt, used Alizarin Red for the cooler spots with some yellow mixed in to get the effect I was
 I used Cobalt blue to mix the green on paper, and add cools to the places that I wanted them to be.
 Next I mixed cobalt blue with some Azo yellow to make my green. At this point I wanted to leave it this light in the background, but I decided it would be better if the background was darker. I mixed my transparent green with a little Phthalo green and a neutral to get the dark green.
 This is a picture of the painting drying but this is what it looks like. I feel I did a pretty good job and got all out of it that I wanted.

1 comment:
Candace I am so glad you stuck with this to the end. Wonderful effect of the glazing process. Way to go
Post a Comment